Making my talk for DockerCon 2020 was a new experience for me, as I'm used to having a stage and live crowd! In case you weren't aware, we recorded our talks beforehand. So, it was just me and my computer. But, I learned a few things along the way!
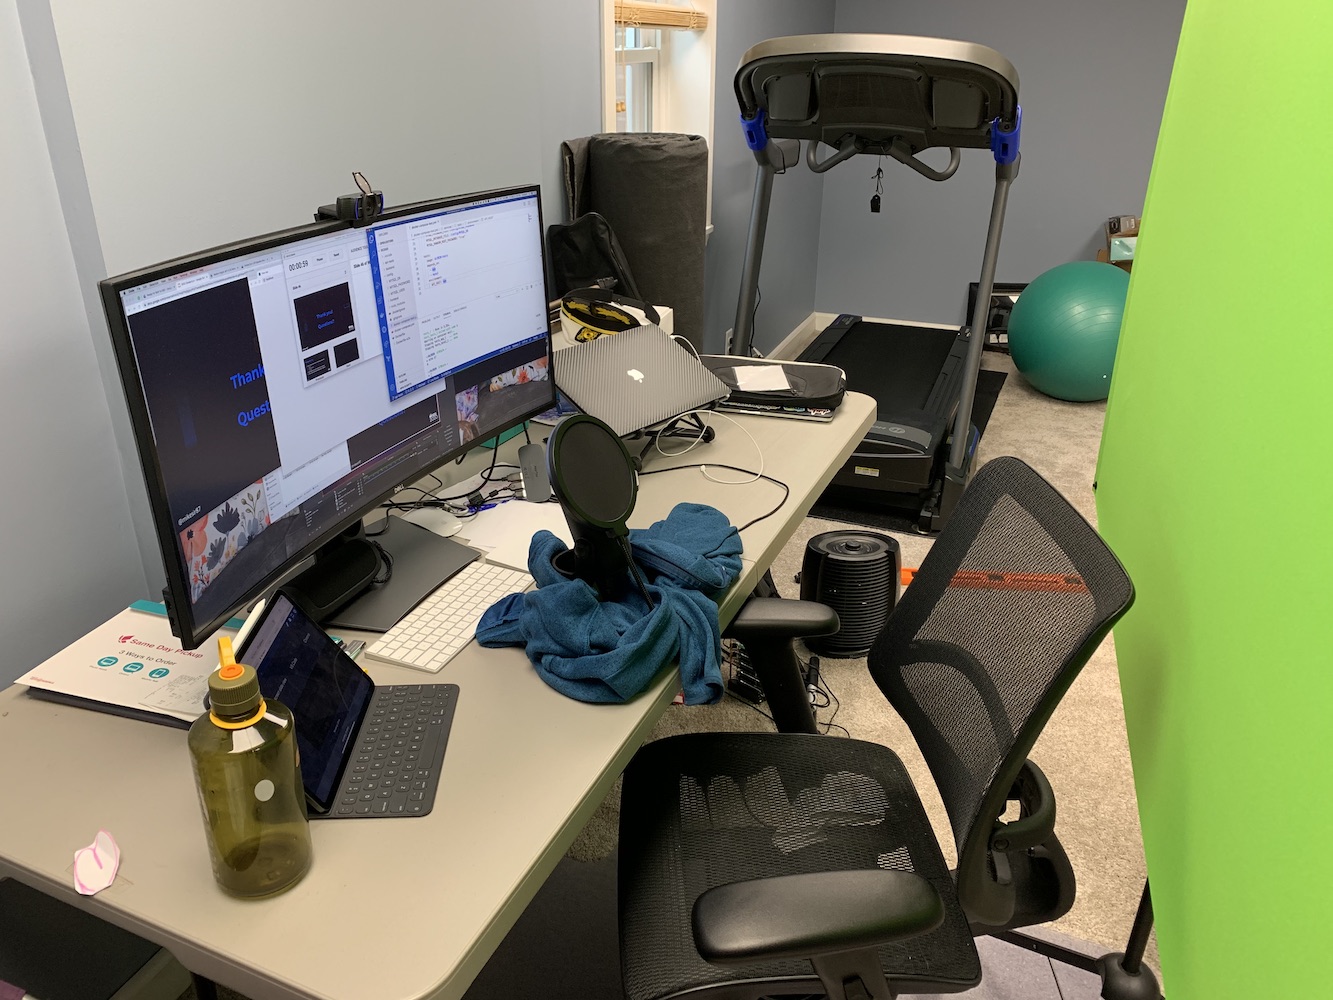
Here's a quick pic of the setup. Forgive me for the odd thing out of its place (like the orange level)!
The Hardware
To ensure you get a good recording, you need to first make sure you have good hardware. Bret Fisher did a great job by giving all of us speakers some pointers and tips he's learned with his various live streams and courses (thanks Bret!).
In the pic above, I have a Blue Yeti microphone. I put it on top of a jacket to help dampen vibrations from the table/desk when I typed on the keyboard or moved my arm. Since then, I've upgraded to a Samson Q2U microphone, which doesn't pick up as many background noises.
Links to hardware (note: links have affiliate tags and I'd appreciate the extra couple of bucks):
- Samson Q2U Microphone - $59
- Logitech C920 HD Pro Webcam - $120
- Valera Explorer 70-inch Green Screen - $140
I'll also note that I have been using my work monitor at home, which is an ultra-wide monitor (the Dell U3818DW). While it took a while to adjust to having such a wide and curved screen, it has been fantastic!
The Software
I didn't have to use many tools to make it all work. For the most part, it was just the normal Google Slides, VS Code, and iTerm. Beyond that, I heavily leveraged OBS Studio for the recording and setting up the various scenes. I also installed the OBS WebSocket plugin, which provided the ability to have a web interface to switch scenes (more on that later).
Putting it all Together
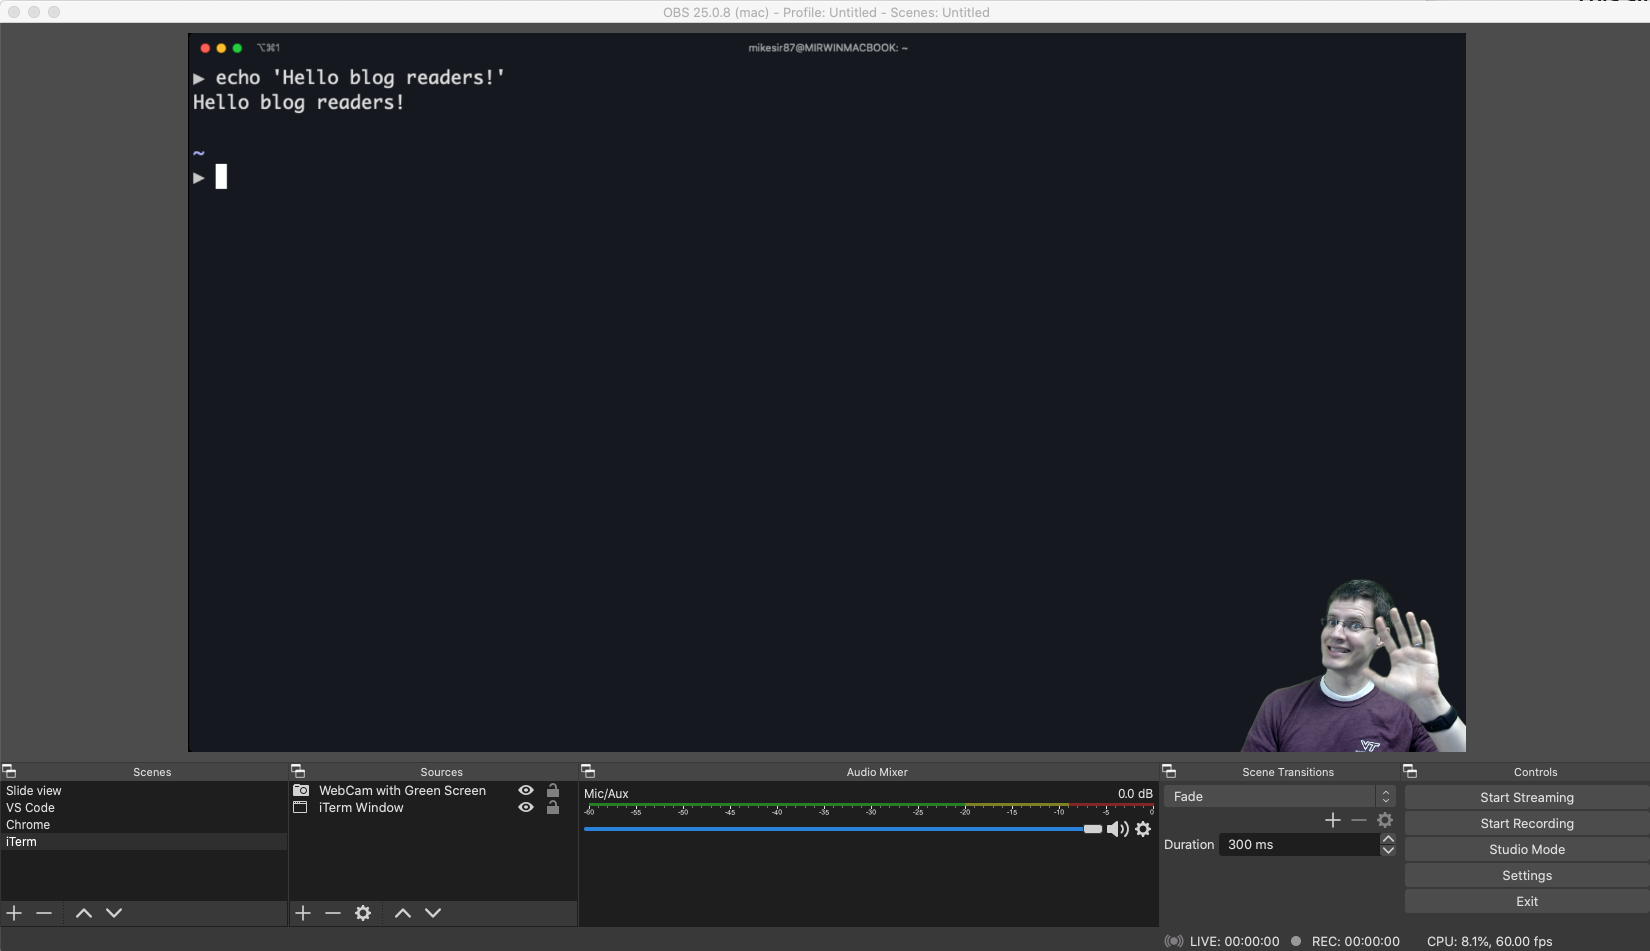
With OBS, you create scenes that represent the different views. For my recording, I had four scenes that I rotated throughout the presentation. For each scene, you define sources, which are the background images, the webcams, or the window captures that populate the scene. For each scene, I only did a single window capture, rather than the entire desktop. This let me have finer control over cropping, sizing, etc.
Laying out my desktop screen
Since I have a wide monitor, I decided to lay things out so I could get to each window without too much craziness. I picked up a couple of tips along the way:
- Put the slide presenter notes in the top-middle of the screen. The idea here was to allow me to look directly at the camera as much as possible so I'm looking "at" the audience. If I needed to reference notes or do a time check, I could do it without needing to move my eyes all over the place.
- Throw the slides all the way in the back. Since I'm advancing using the presenter view and OBS can watch a window, keep it in the back as much as possible. But, make it large to ensure the image isn't downsampling.
- Keep things I will interact with on the right side of the screen. When I'm interacting with VS Code, the terminal, or the browser, I need to look at those programs. Since my webcam is mirroring (that was tough), when I look to the right, it makes my little personna look like I'm actually looking at the screens, rather than off-screen.
- Allow enough click region to swap between windows quickly. I overlapped the windows in a way that I could click find and get to the right window as quickly as possible.
And here's the full screen layout! I also have the preview at the bottom (called a "Windowed Projector" in OBS), which let me see screen transitions in my peripheral vision and know that I'm actually in the right mode.

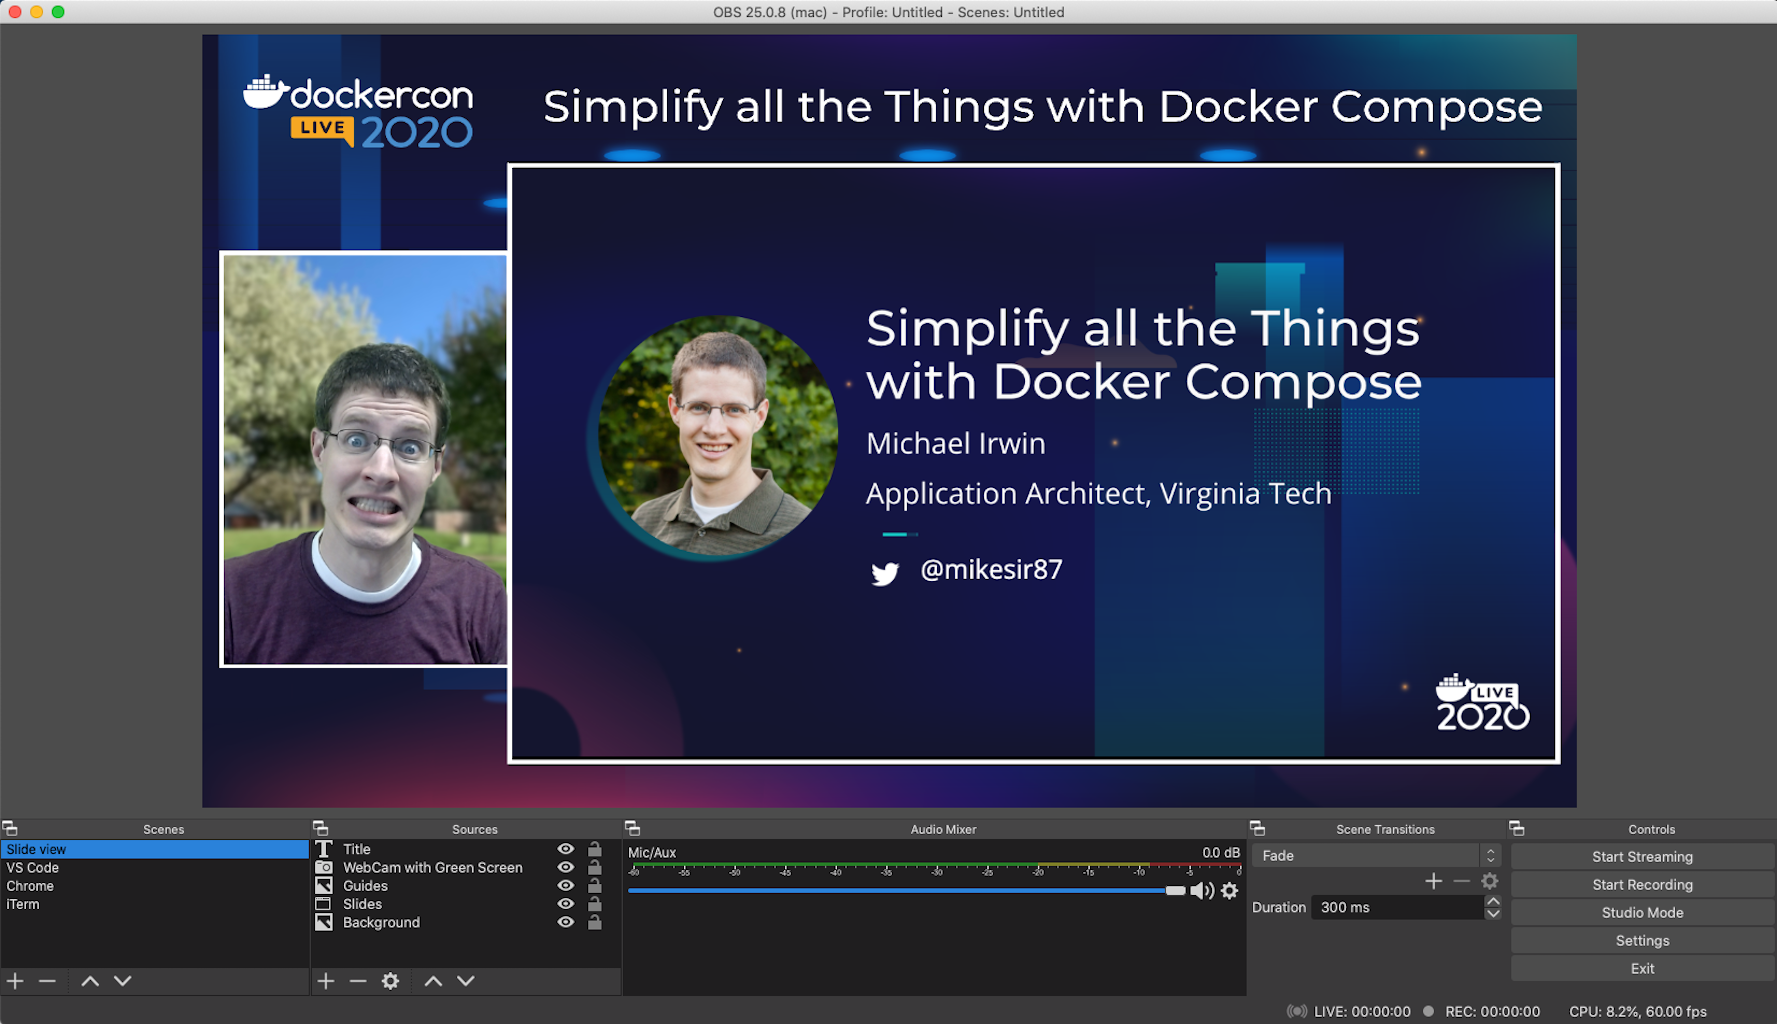
Scene 1: Slide View
While in the slide view, I interacted with only the speaker notes window when in presentation mode on Google Slides. I did zoom in the window so I could see bigger font and previews. But, for the most part, I tried to look directly at the camera as much as possible.
Scene-wise, here's how I set it up! I had five scenes, and working from the bottom/up they are:
- Background - the DockerCon themed background that was provided to all speakers. We had a few different ones to choose from and I went with this one!
- Slides - the windowed view for the slides. I had to apply a transform to crop the top off to remove the Chrome URL bar, tabs, etc. Just the slides!
- Guides - the guides are the white boxes that are around both the slides and the my video feed, as well as the background image for the webcam (which is actually my front yard!). I made this in GIMP myself! But, I did it pretty easily by laying things out in OBS, took a screenshot, bringing it into GIMP, and then creating the white borders. Slap in the frontyard pic and call it done!
- WebCam with Green Screen - my webcam! I had to play with the transform to get the image cropped just right and then applied a "Chroma Key" filter to remove the green screen. It did take a while to get the right settings to get the green screen without bleeding into my clothes or skin.
- Title - the "Simplify all the Things with Docker Compose" text banner along the top.
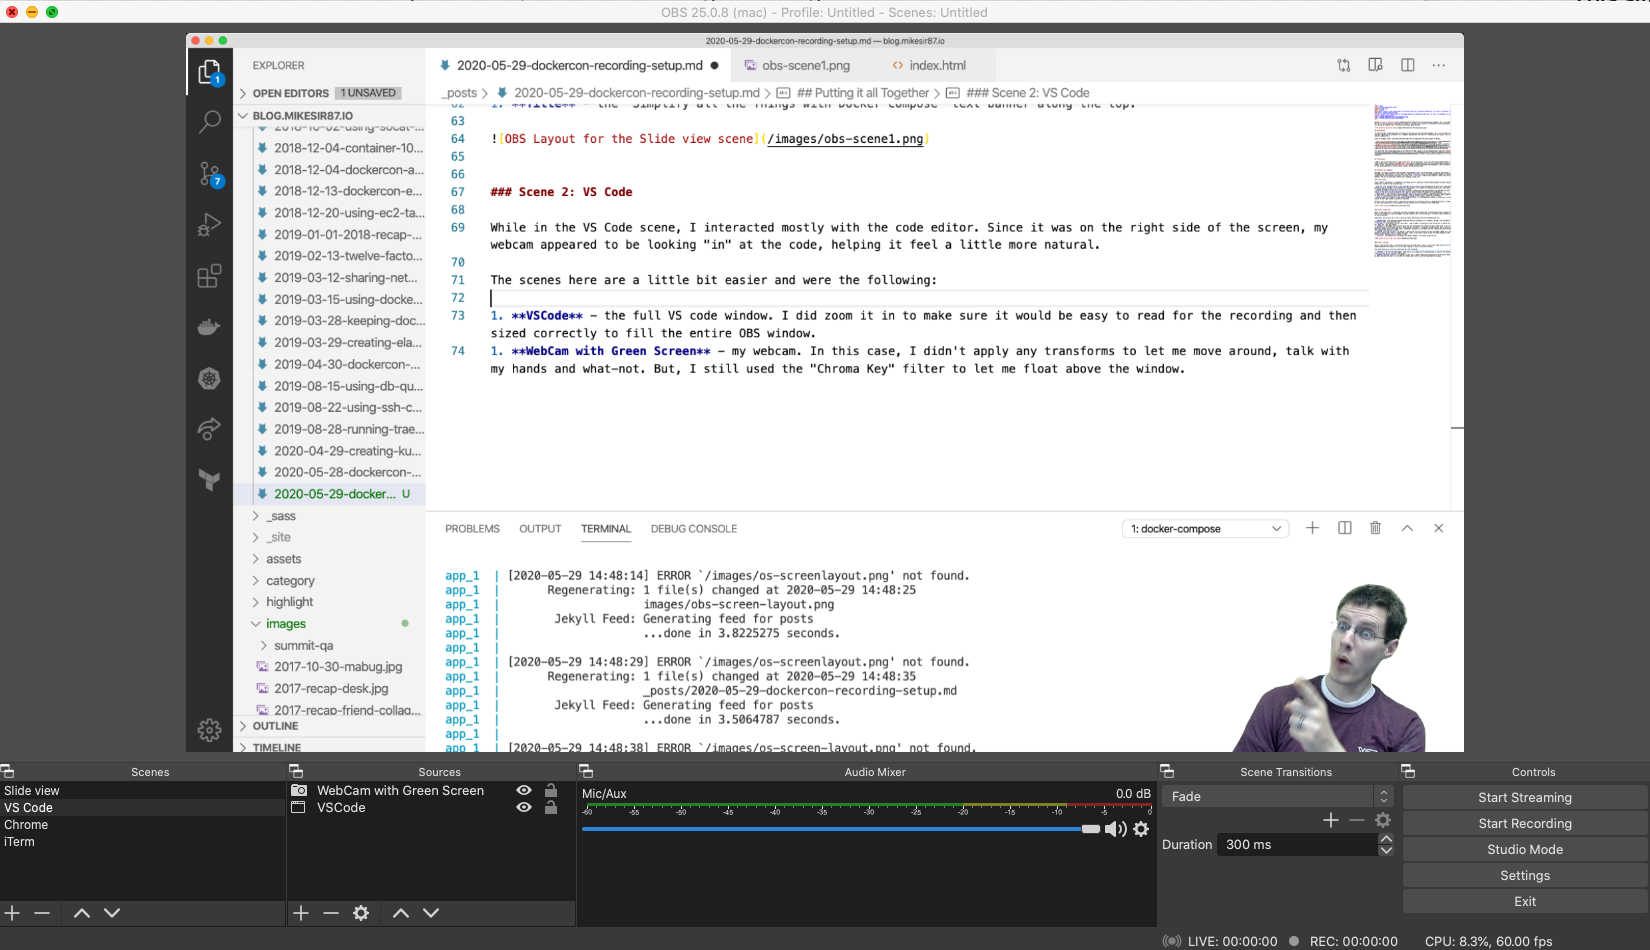
Scene 2: VS Code
While in the VS Code scene, I interacted mostly with the code editor. Since it was on the right side of the screen, my webcam appeared to be looking "in" at the code, helping it feel a little more natural.
The scenes here are a little bit easier and were the following:
- VSCode - the full VS code window. I did zoom it in to make sure it would be easy to read for the recording and then sized correctly to fill the entire OBS window.
- WebCam with Green Screen - my webcam. In this case, I didn't apply any transforms to let me move around, talk with my hands and what-not. But, I still used the "Chroma Key" filter to let me float above the window.
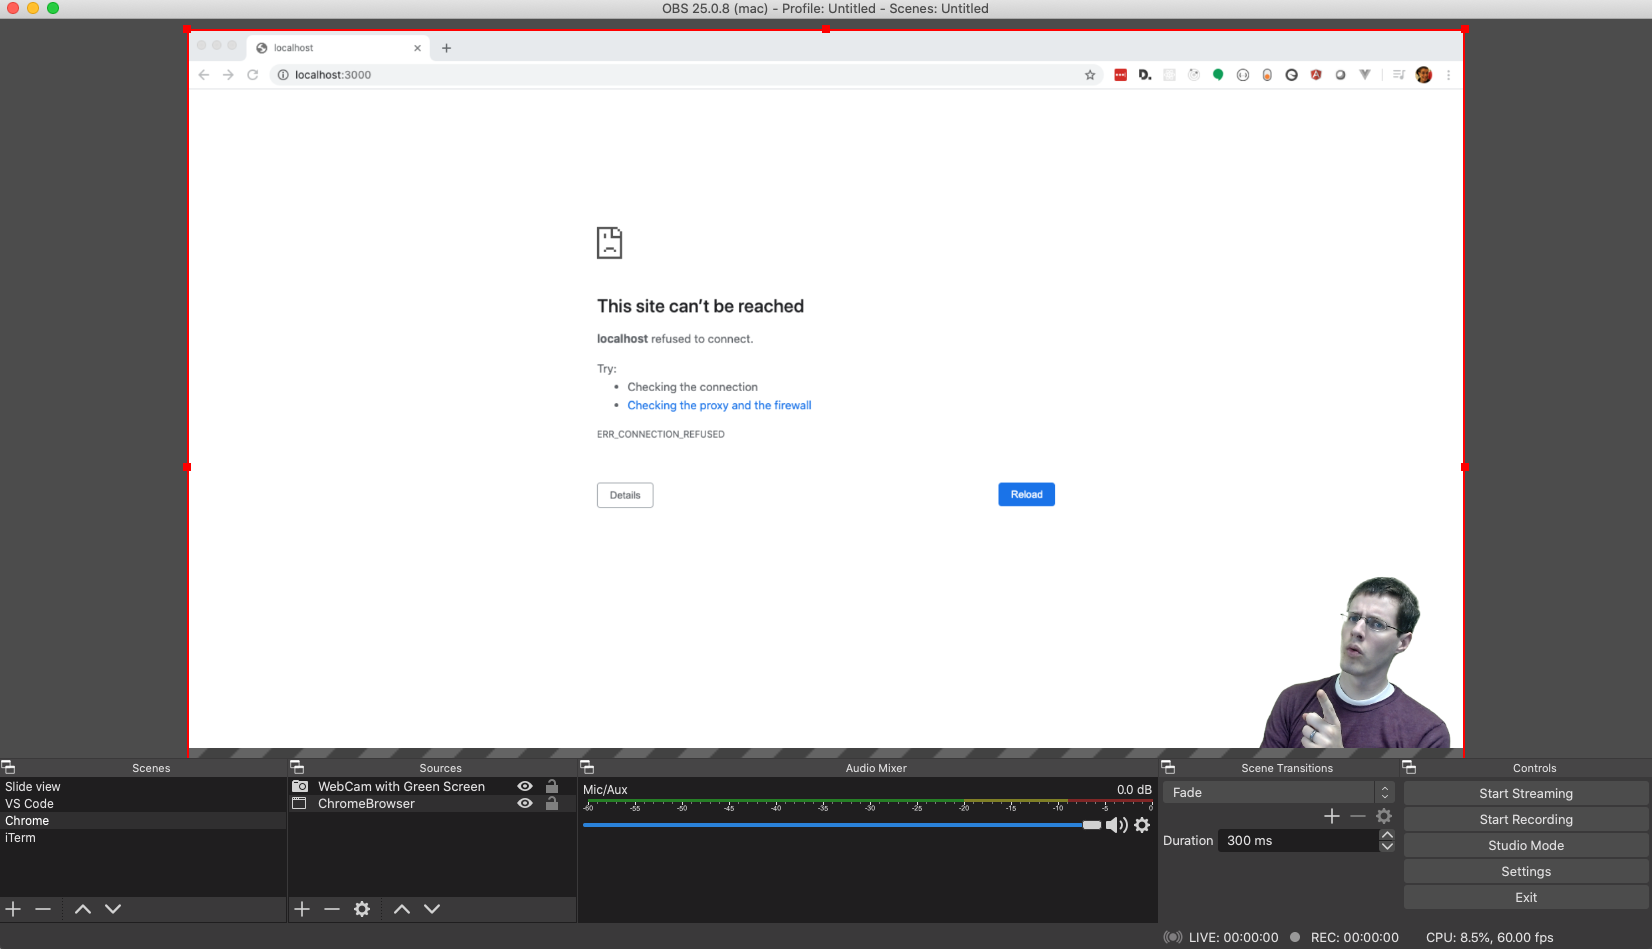
Scenes 3 and 4: Chrome and iTerm
This scene worked very much the same way as the VS Code scene, just swapping VS Code for the Chrome browser. In fact, I pretty much copy and pasted the scenes and changed the windows they were pointing to.
Recording the Session
For the recording, I did it all in one take. I didn't want to have to do any post-processing, as that's an entire additional can of worms. I was lucky in that I only had to record the session twice, as the first time ran 32 minutes! Oops!
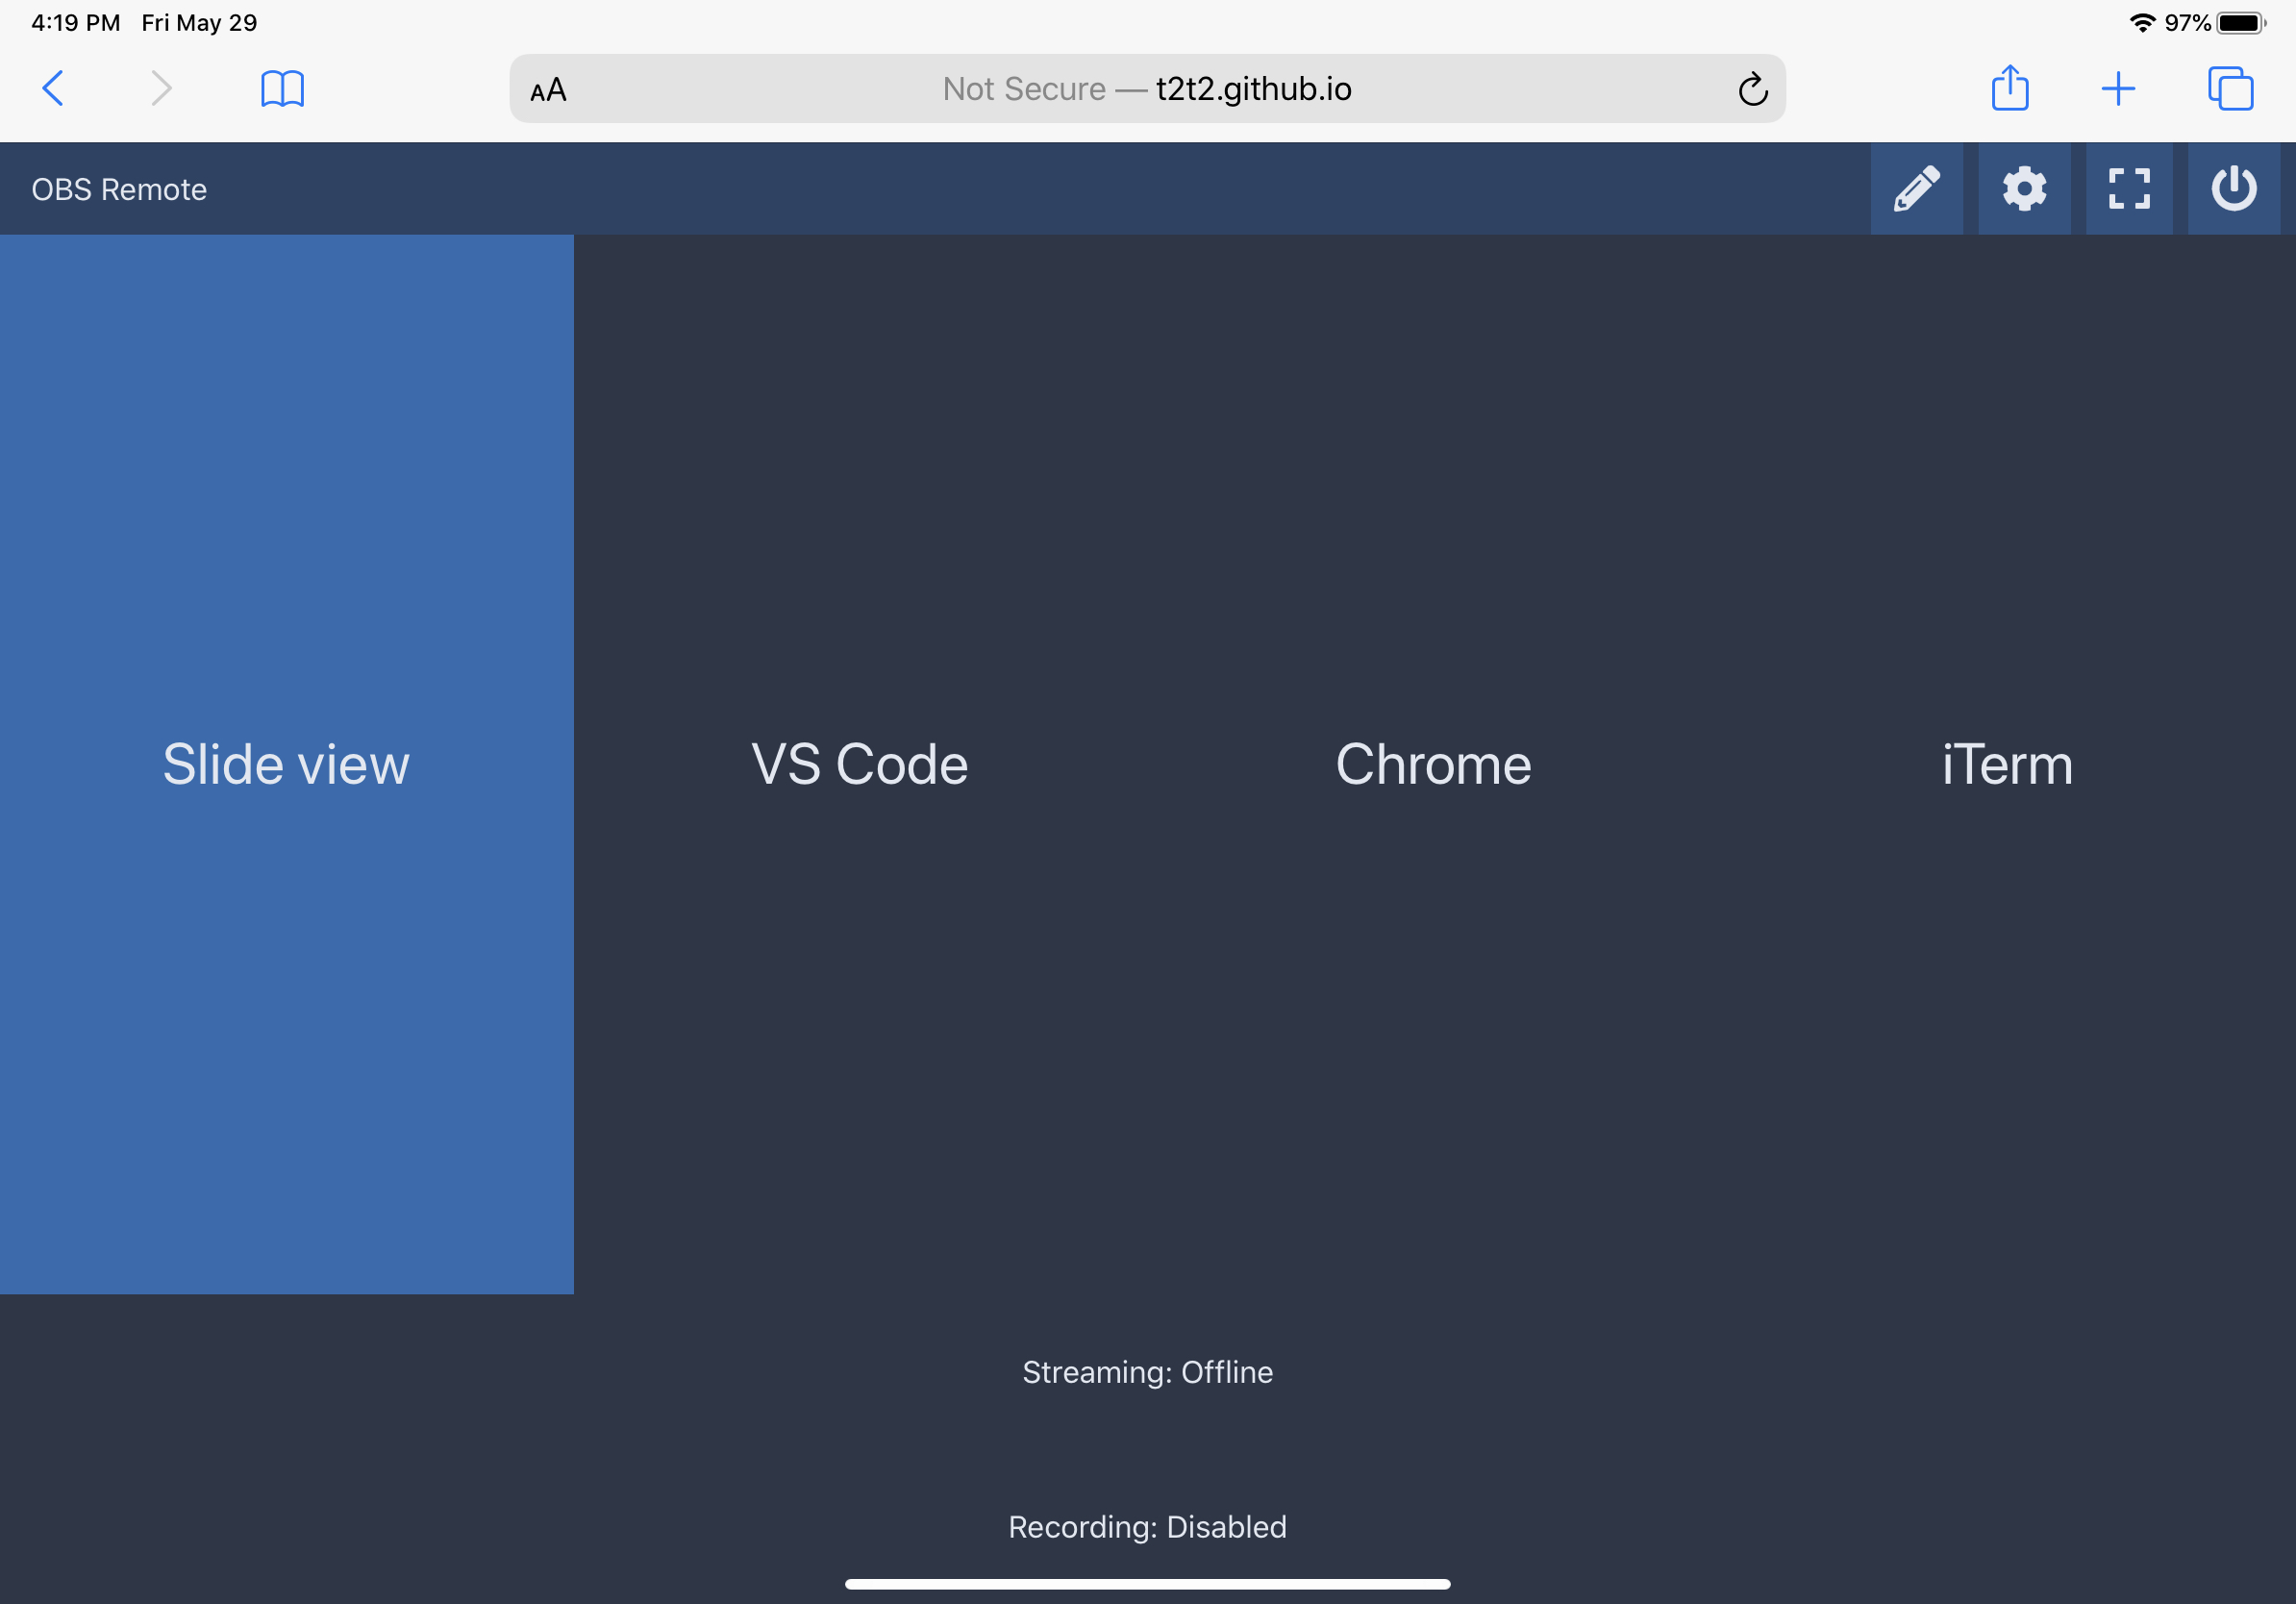
While recording, I heaviliy leveraged my iPad as a scene switcher. With the OBS WebSocket plugin installed, I could open the OBS Tablet Remote website on my iPad and connect to my machine. From there, I could create a dashboard on my iPad that let me switch the scenes fairly quickly. I also started and stopped the recording using the "Recording" button at the very bottom.
One tip: remember to adjust power settings on your tablet to not shut off too quickly. I did a semi run-through and my iPad shut off. While not the end of the world, the Face ID does pull me away from looking at the camera and slows things down.
Wrap-Up
Beyond that, that's pretty much it! Would I do it again? Absolutely! It was a lot of fun and I think I'd be able to do it much faster now that I've picked up a few tips along the way.
If you have any questions, let me know!